Monday, April 17, 2017

New features in AutoCAD Civil 3D 2018


by Timothy Corey

This article will explain new features of AutoCAD Civil 3D 2018.

1. The AutoCAD .dwg file format has been updated and can no longer be directly opened by previous versions of AutoCAD. This applies to all flavors of AutoCAD: AutoCAD, AutoCAD Architecture, AutoCAD Civil 3D, AutoCAD Map 3D, etc.


2. Offset Alignments with Dynamic Profiles -- Now when you create an Offset Alignment, you can have Civil 3D automatically create a profile for that alignment. The new profile gets its elevations by your setting of the cross slope from the main profile. The new profile can be placed in the existing profile view as a superimposed profile. 


Notice how you can set a profile view into which you superimpose the new offset profile and how you can set a cross-slope.


If you need finer control of the cross slope, say you want to slope at -4% within a particular station range, after the offset alignment and profile have been created, click the offset alignment and on the Ribbon, find Offset Profile Properties.


On the Offset Parameters tab, create Cross Slope Regions. Notice how you define the transition between cross slope regions. In the example below, the cross slope will transition from -2% to -4% over 200' of profile, will be at -4% for 300', and will transition back to -2% over 200'.


All that, and it's dynamic. If you modify the main profile, the offset profile will update.


3. Create Connected Alignment -- This feature allows to you create an alignment and profile that "snap" to two other alignment and profile pairs. Think snap-able curb returns.

First, Create Connected Alignment.


You will be prompted to select the two alignments that will control your new alignment. Once you do that, you are prompted to "Pick a location for the selected alignment." Select a point that represents which curb return to create. In a T intersection, there will be two possibilities and in a crossing intersection, there will be four. 
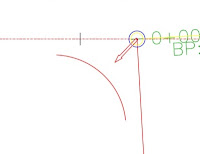


Note the connection alignments, set the curve radius and the connection overlap. This places a small segment directly atop the connection alignment on each end of the return. The overlap cannot be 0.


Move to the Connected Profile tab and set your profile options:


4. Create Corridor with Multiple Baselines. Used in conjunction with Offset Alignments and Dynamic Offset Profiles, this feature removes the need for Offset Assemblies. Previously, you would use an Offset Assembly in areas where you wanted to control the corridor from a main baseline, but you wanted some subassemblies to be perpendicular to a different alignment. A good example is where you have a bus turnout and you want the curb/gutter/sidewalk to transition, but have the subassemblies perpendicular to the new curb line, not centerline.


This new features allows you to reduce the complexity of Assemblies and to set different frequencies. Because the offset alignment and its dynamic profile are tied to the centerline and the lane subassembly transitions are tied to the offset alignment and profile, the entire corridor is easily controlled by modifying one baseline. 

Having different frequencies does cause a small issue with the surfaces you create from your corridor. If you use subassembly links, like Top, to create the surface, you might get some undesirable results:


We get better results using feature lines as the data type when we create corridor surfaces.


5. Relative Elevation Feature Lines -- Relative to what? Relative to a surface! That's right, when you create or edit a feature line, you can tell all or some of its elevation points to be relative to an existing surface. Want the base of the retaining wall 12 inches below the FG surface? No problem.

When you create a feature line, at the point where you tell it which surface to use for its elevation source, you'll have the option to set the elevation relative to the surface.


A nice new detail: After setting the first point as relative to a surface, when you are ready to input the elevation for a subsequent point, the command line defaults to Relative Elevation with the same relative value you used for the previous point. No more saying SU for every single point you want to place on a surface.


As the surface is modified, all feature line points that are derived from the surface relationship will update. 

6. Corridor overlap resolution -- In areas where your subassemly links overlap one another, your corridor will suffer from what are commonly called "Bowties".


Well, now Civil 3D will either clean this up for you or let you clean it up using the new Bowtie Cleanup Tools.

To use the automatic tool, be sure you set corridor feature settings to allow cleanup for your geometry type:


Set the Automatic Clear Bowtie Options.


To use the manual tool, pick the corridor in the drawing window. On the ribbon, find Clear Corridor Bowties.


Delight in your results


7. Some of the tools that had been introduced as subscription extensions in previous versions, such as Pipe Sizing and Analysis, Traverse Editor and Plan/Plan Sheet Production have been enhanced and have graduated to become "included" commands in AutoCAD Civil 3D 2018. Congratulations to those commands.

Best regards,

Tim


Thursday, March 23, 2017

AutoCAD 2018 -- New Features

AutoCAD 2018 -- New Features

Before we get started on the list of features, you need to know: The drawing file format has been changed for 2018. You will not be able to open 2018 files with older versions of AutoCAD, but you will be able to save back. Save back functionality will vary by flavor of AutoCAD. AutoCAD 2018 to AutoCAD Old will be easy. Civil 3D 2018 to Civil 3D Old will require a workflow.


Dialog box upgrades

1. Navigation boxes for commands like Open, Save, and Attach now remember your sorting preference from before. 

2. Other dialogs, such as Drafting Settings can now be resized. 


3. The True Color tab in the Select Color dialog allows input of RGB colors as comma-separated values. I am at a loss to understand what is new in this feature, as you have been able to input comma separated numbers in this dialog since I can remember. 

User Interface Enhancements

4. The Quick Access Toolbar menu now includes a Layer Control option. It is turned off by default, but is easily activated. I don't know if this feature will also be activated in AutoCAD Civil 3D 2018, but I hope so. 


5. System Variable Monitor has an icon on the Status Bar and it lights up when any of your monitored variables have changed. Useful. 

6. Rubberband line color can be set. In 2017, they are an orange color, but in 2018 you can make the rubberband line any color you want, even invisible.


Object Selection


7. Off-screen selection. I think you're gonna like this feature. It allows you start a selection process, like crossing or window, and be allowed to zoom and pan to off-screen objects while AutoCAD waits for you to finish the selection. Objects that have been pushed off-screen during your zooming and panning still get selected. This is a very nice feature.


8. Ability to select objects within gaps in their linetypes. Instead of having to be careful and pick on visible segments, you can be just a little more careless, but still get your object. This will help avoid errors. People sometimes think they selected their object.

Documentation

9. Import SHX fonts as text when importing PDF files.Previously, any SHX font-based text written to a PDF from AutoCAD, when imported back into AutoCAD, would come in as geometry, not as text. Now it can come in as text.


10. PDF Import dialog boxes display thumbnail previews of PDF files. 

11. Combine multiple text objects into a single Mtext. This is the TXT2MTXT commanda graduate from Express Tools. This command has been around for a long time, but has now been moved to the Insert ribbon tab. Not just that, TXT2MTXT has been given a facelift, with several new settings, options and fixes to make it work more efficiently.


Collaboration

12. External references are now supported by AutoCAD to reduce the problems created by broken reference paths. You know, like when you save your host drawing to different path?


  • Relative Path is now the default path type when you attach or overlay an xref. Hallelujah!
  • A new REFPATHTYPE system variable allows you to set default path type to your choice.             Previously, you had to use a registry hack to set a default other than Full Path.
  • You can now assign a Relative path within a host drawing that has not yet been saved. The problem it fixes wasn't that big of a pain, but it shows that our friends at Autodesk do care about making the software work correctly.
  • If the current drawing includes relative references and you save it to a different location, you get a dialog, see above, that saves you from making a costly mistake. Notice the button allowing you to automatically update the relative reference paths. This is my personal "top new feature" for AutoCAD 2018.
  • The Xref dialog has a couple of new options that help you Select New Path and Find and Replace will help you repair broken reference links. These are nice upgrades.
  • Orphaned references now display correctly within the xref window's tree view, even if the link is broken.
  • Unloaded Xrefs can be opened. 
  • If you rename a reference file using a different dialog, like ClassicXref or Rename, the reference name is updated in the External References dialog without having to reload.
13. Share Design View is a preexisting tool that makes it easy to publish your design files to the cloud and share them with others. The consumer of your design views doesn't need Autodesk software and doesn't need to login to view your files. The tool has been enhanced to support AutoCAD 2018 dwg format.


Speed

  • Drawing file format has changed, allowing better speed in opening and saving drawing files, especially for those of you who use many viewports in a drawing or who have drawings that are heavy with annotative objects. 
  • High resolution monitor support. Full support for those awesome 4k monitors.
  • REGEN3 is for 3D modeling users. By rebuilding the geometry in all viewports, this command will remove discontinuities in the display of 3D solids. 
  • You can now turn off Smooth line display but continue to use the High quality geometry option.
  • 3D navigation performance has been enhanced significantly. In fact, Autodesk states, "...the performance for manipulating 3D models is approaching that of 2D drawings." How's that for welcome news?
  • Online Maps use the new Bing Maps v8.0, providing better performance. Sweet.

Go mobile

Your AutoCAD subscription includes the AutoCAD Mobile app, allowing you to run AutoCAD on your tablet or phone. You won't have to carry plans to your jobsites!


My congratulations to Autodesk for continuing to make practical modifications alongside stunning modernization.

Tim


Friday, December 11, 2015

How to create bearing labels that show all bearings as north


Article by Timothy Corey


This article is about a way to make Civil 3D display all bearings in their northerly directions. My solution was going to be a process that would involve three expressions and one label style that would include two components. Jeff Mischler, my friend and the Yoda of Civil 3D, showed me a way to do it with one expression and one label style having one component. Jeff's solution, in my words:

Step 1 -- Create a new Expression. This post will show the process using a General Line label style. It could be performed in the same manner for Alignment Line labels or for Parcel Segment labels. Right click and pick New... 


I going to blow this image up large so you can read the expression:


If it were to be translated into English: Take the statement "direction of line line is either smaller than or equal to 90 degrees (0 is north, angles are to the right) or larger than or equal to 270 degrees." If that is true, then return the segment direction, but if the statement is false, return the segment direction plus 180 degrees (in radians, pi.) That makes southerly lines answer with a northerly direction. Slick. Thanks, Jeff.

In case you don't understand what pi is doing in there, general segment direction is returned in radians. Using radians, pi is half of a circle, 180 degrees, or 3.1415926... radians. What you and I think of as AutoCAD 270 degrees is pi*1.5, or 4.712...radians. Using pi instead of the actual radians lets you avoid rounding errors that can only be avoided by typing out the radians to many decimal places. It's far easier to just say pi * 1.5 than 4.7123889. Plus it's easier to remember. That's why you see pi in these formulas.

Be positive that you have set Format result as: to Direction.Your expression won't work if you don't.

Create a new label style. Pick the Bearing component in Component name list.


Go into Contents:


Select inside the preview window and delete the contents, then drop down the Properties list.


Set the settings to your desire, then press the right-pointing arrow that sits just to the right of the Properties list. The Preview window will populate.


Hit OK, set the rest of your label properties and components and go test it.


That's way easier than how I was going to to do it. 


Friday, February 27, 2015

Subassembly Composer, A Primer -- Part 6, Creating a Shape


Article by Timothy Corey


Having left our exploration of Subassembly Composer at the point where we know how to set both geometric and surface targets, we realize that every subassembly we have created has been zero-thickness. You can create surfaces from this type of subassembly, you can quantify it using QTO Manager but you cannot take advantage of Civil 3D's Material Volume reporting capabilities...

Until now. This part of the primer will show you how to create a basic Shape object in Subassembly Composer. By now you know how to create points and links, so for this exercise, we let you alone to create your version of a sidewalk. Use your own numbers to make a rectangle, something like this:


Before you draw your shape, one important consideration. Will you be creating Surfaces from the Link Codes you apply to your shape? If so, remember, Civil 3D surfaces cannot handle vertical faces. Although you could rely on your users to set Overhang Correction in their Corridor Surface creation, many find it more reliable to do the correction themselves.

For example, say we plan to use the base of the Shape as a Datum surface. If we were to rely on Overhang Correction for this assembly, the far right end of our sidewalk would likely be missed in modeling the Surface.


To model this correction into the subassembly, we created the lower right point an X offset of -0.001 from the upper right point. To create the lower left point, we used an X offset of 0.001. 

If you only plan to use this subassembly for quantity takeoff, but not for a surface, ignore what was said above and use vertical faces all you like.

Back to the How-to: To create a Shape, drag the Shape tool from the Toolbox to the Flowchart.


Now, all you need to do is add the Links that define the Shape. You can either press the Add Link button four times or you can press the little box with pointer icon at the right end of the box. Press the icon and then select inside the shape.


The next part of the series will show you how to allow users to assign their own Point and Link Codes while placing your custom subassembly. It might be a couple of weeks, as our schedule is full.